| You may get .psd* file of "Platinum Credit Card design" Photoshop tutorial by making a payment. Put the tutorial title in "Add special instructions to seller" line of PayPal and it will be sent to you shortly. |
- Add Vector Mask to this layer.
- To create a mask that reveals the entire layer, click the New Layer Mask
 button in the Layers palette, or choose Layer > Layer Mask > Reveal All.
Creation of a texture.
- Create a new layer.
- Make an elliptical selection using Elliptical Marquee
 .
. - Click on "D" Default Foreground and Background colors.
- Choose Filter > Render > Clouds.
- Filter > Texture > Stained Glass (10, 4, 3).
- Filter > Blur > Radial Blur (100, Zoom, Best).

- Ctrl + Click on Layer1 (Rectangular) to load selection.
- Choose Select > Inverse in option bar.
- Return to the layer with Ellipse , choose Edit > Clear to remove superfluous parts of the circle.
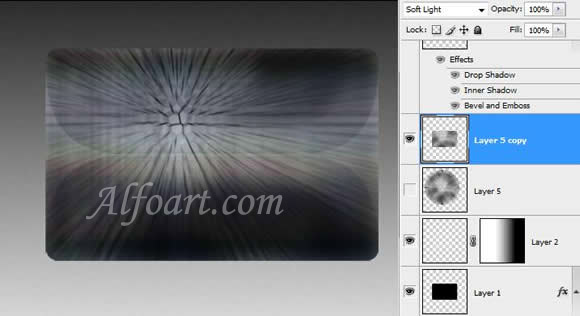
- Choose Soft Light Blending Mode.
- Add numbers and letters just like in the original cards. You can find fonts here. Click on Download, save zip and extract .ttf* files into Program files > Common Files > Adobe > Fonts.
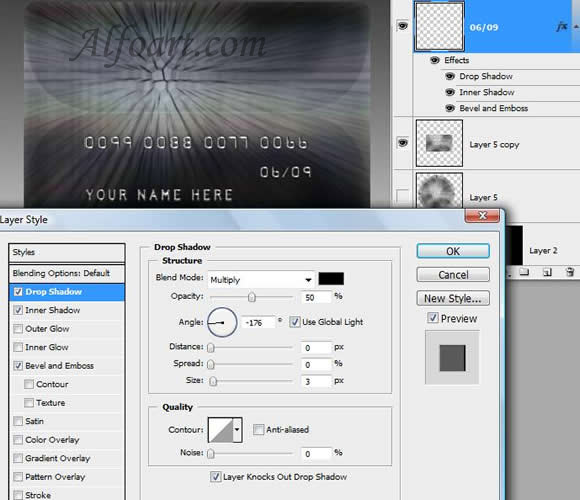
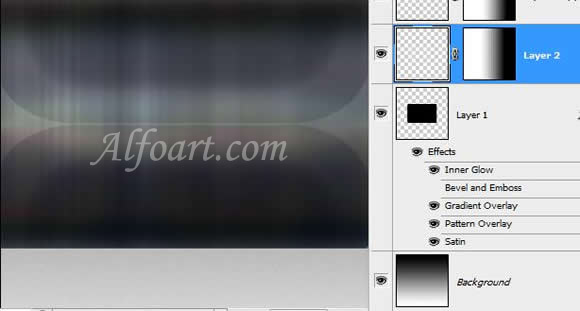
- Apply layer style effects, just like in the examples below: